maandag 14 december 2020

Snowflake Series : Secure views and Row Level Security

Introduction

In this introductionary blogpost, I'll tell you a story about Secure Views together with a howto set up Row Level Security. I've done this before with SSAS Multidimensional, SSAS Tabular model and even on the database with Azure SQL database and now with Snowflake.


What is the difference between a normal view and a secure view? For security or privacy reasons, you might not wish to expose the underlying tables or internal structural details for a view. With secure views, the view definition and details are only visible to authorized users (i.e. users who are granted the role that owns the view).

Setup

So, what is the setup for the demo that is used as starting point for this blogpost? For this blogpost, I created a database, with two tables (data and a security table) and a couple of views. You can imagine that you want hide the tables for the users and use the views as a security layer (with Row Level Security).


Here is the script for the creation of the table. I used an example of Netflix series and movies for this purpose.

//=============================================================================
// Description : This is a Demo sql for explaining secure views
//============================================================================
//=============================================================================
// Set context
//=============================================================================
USE ROLE sysadmin;
USE WAREHOUSE Compute_WH;

//=============================================================================
// Create the Database and the Tables
//=============================================================================
CREATE OR REPLACE DATABASE SecureViews;
--DROP DATABASE IF EXISTS SecureViews;

USE DATABASE SecureViews;
USE SCHEMA PUBLIC;

CREATE OR REPLACE TABLE NETFLIX_SERIES (
    ID NUMBER,
    TITLE STRING,
    MOVIECATEGORY STRING
);

INSERT INTO NETFLIX_SERIES
VALUES 
  (0, 'Queens Gambit', 'Drama'), 
  (1, 'Ozark', 'Thriller'), 
  (2, 'The Crown', 'Drama'), 
  (3, 'Mindhunter', 'Don''t know'),  
  (4, 'The Haunting of Hill House', 'Horror'), 
  (5, 'Tiger King', 'Hmmm'), 
  (6, 'Stranger Things', 'Don''t know either');


Next, I created the User security table, with a Moviecategory and UserId as columns. For this demo I want to limit the access per user on certain movie categories. The user Hennie is allowed to see movies in the category "Drama" and Peter in the category "Thriller".


SELECT CURRENT_USER();

CREATE OR REPLACE TABLE USERSECURITY
(  
   MOVIECATEGORY STRING,
   USERID STRING
);

INSERT INTO USERSECURITY(MOVIECATEGORY, USERID) VALUES ('Drama', 'HENNIE'), ('Thriller', 'PETER');

SELECT * FROM USERSECURITY;


And here is the result of the SELECT:


Create a secure view

The next step is creating the secure view with the keyword SECURE in CREATE SECURE VIEW. Here is the DDL for the view.


CREATE OR REPLACE SECURE VIEW NETFLIX_SERIES_Secure_view_v2
AS
SELECT 
NS.ID,
NS.TITLE,
NS.MOVIECATEGORY,
US.USERID
FROM NETFLIX_SERIES NS
INNER JOIN USERSECURITY US ON NS.MOVIECATEGORY = US.MOVIECATEGORY
WHERE USERID = CURRENT_USER();

SELECT * FROM NETFLIX_SERIES_Secure_view_v2;


I executed this SELECT with user HENNIE and it is only showing the movies with category "Drama"


Next, I looked at SHOW VIEWS command

SHOW VIEWS;


And here you can see the definition of the view


Can I create this RLS on a normal View? Yes we can.. 


/=============================================================================
// Can I create the security without the SECURE key word?
//=============================================================================
CREATE OR REPLACE VIEW NETFLIX_SERIES_view
AS
SELECT 
NS.ID,
NS.TITLE,
NS.MOVIECATEGORY,
US.USERID
FROM NETFLIX_SERIES NS
INNER JOIN USERSECURITY US ON NS.MOVIECATEGORY = US.MOVIECATEGORY
WHERE USERID = CURRENT_USER();

SELECT * FROM NETFLIX_SERIES_view;


One thing I tried was creating a materialized Secure view. 


//=============================================================================
// Can I create a Secure materialized views?
//=============================================================================
CREATE OR REPLACE SECURE MATERIALIZED VIEW NETFLIX_SERIES_MATERIALIZED_SECURE_view
AS
SELECT 
NS.ID,
NS.TITLE,
NS.MOVIECATEGORY,
US.USERID
FROM NETFLIX_SERIES NS
INNER JOIN USERSECURITY US ON NS.MOVIECATEGORY = US.MOVIECATEGORY
WHERE USERID = CURRENT_USER();


Now creating a materialized view isn't possible because of the reason that it's not possible to create a materialized view based on two tables.


SQL compilation error: error line 0 at position -1 Invalid materialized view definition. More than one table referenced in the view definition


Check the RLS views with another User

Now create another user "PETER" and what are results that Peter can see of the Netflix series and movies. Here are some scripts for creating the user PETER.


USE ROLE ACCOUNTADMIN;

CREATE ROLE IF NOT EXISTS SecureViews;

--GRANT USAGE ON WAREHOUSE COMPUTE_WH TO ROLE SecureViews;

GRANT USAGE ON DATABASE SecureViews TO ROLE SecureViews;

GRANT USAGE ON SCHEMA SecureViews.PUBLIC TO ROLE SecureViews;

GRANT SELECT ON ALL TABLES IN SCHEMA SecureViews.PUBLIC TO ROLE SecureViews;
GRANT SELECT ON ALL VIEWS IN SCHEMA SecureViews.PUBLIC TO ROLE SecureViews;

--Grant role to USER PETER
GRANT ROLE SecureViews TO USER PETER;


Next step is logging as user PETER and query the normal view.


SELECT * FROM NETFLIX_SERIES_view;


And here is the result of the query. Peter sees the Thriller category, only.


Can peter see the same with the SECURE view? Yes he can...


SELECT * FROM NETFLIX_SERIES_Secure_view_v2


Now what is the the difference between a normal view and a SECURE view? As snowflake states : "Views should be defined as secure when they are specifically designated for data privacy (i.e. to limit access to sensitive data that should not be exposed to all users of the underlying table(s))."

SHOW VIEWS;

And the definitions are not present. So with Secure views you can't see the definition of the view.


There is a drawback when using the SECURE keyword. Some perfomance optimizations are bypassed and therefore some precautions are necessary when adopting this in queries.

Final Thoughts

This blogpost is about Secure views and row level security.


Hennie

donderdag 10 december 2020

My courses and book recommendations list....

Courses / Certifications:

Azure Fundementals, AZ-900 - https://www.youtube.com/channel/UCdmEIMC3LBil4o0tjaTbj0w (Adam is very good at explaining terminology about Azure. I have watched almost all of his videos).

Devops, AZ-400 https://www.udemy.com/course/az-400-designing-implementing-microsoft-devops-soln-tests/ (Very good course about git, Azure devops and other things).

Datavault, https://www.geneseeacademy.com/ (the training institute for data vault modeling).

Snowpro, https://www.snowflake.com/certifications/ (not directly a course or a book, but with the study guide in hand you can get to know Snowflake and get a certificate).


Books :


General

Daan van Beek, The intelligent data-driven organization. (must read book, for anyone dealing with data in organizations, is in dutch).

DAMA-DMBOK, Data management Body of knowledge (tough and difficult to read, but it shows the entire data field, only if you are really interested in reading heavy stuff).


Conceptual

Steve Hoberman, Data Modeling Made Simple: A Practical Guide for Business and IT Professionals


Datavault:

Daniel Linstedt & Michael Olschimke, Building a Scalable Data Warehouse with Data Vault 2.0 (Best book so far, but a bit too extensive).

John Giles, The Elephant in the Fridge: Guided Steps to Data Vault Success through Building Business-Centered Models (on advice, seems to be a good read).

Hans Hultgren, Modeling the Agile Data Warehouse with Data Vault (contains relevant matters).


Dimensional:

Christopher Adamson, Star Schema: The Complete Reference (A lot of information about starmodelling, good read).

Ralph Kimball & Margy Ross, The Data Warehouse Toolkit: The Definitive Guide to Dimensional Modeling (classic).

Ralph Kimball et al., The Kimball Group Reader (everything Kimball has written in blogs).

Lawrence Corr & Jim Stagnito, Agile data warehouse design (dimensional design).


Fact-Based:

Jan Pieter Zwart, Marco Engelbart & Stijn Hoppenbrouwers, Fact Oriented Modeling with FCO-IM. (This is the old NIAM method, in a new guise, insightful).


DevOps:

Gene Kim, the Unicorn project (Sequel to the Phoenix book, nice, but Phoenix book was more of an eye opener).

Gene Kim, The Phoenix project (must read book, easy to read and explains the DevOps principles in a fun way).

Gene Kim, Jez Humble, Patrick Debois & John Willis, DevOps Handbook (actually a must read book, goes into the depth of DevOps).

Matthew Skelton & Manuel Pais, Team Toplogies (interesting book about team organization).

Mirco Hering, DevOps for the modern Enterprise.


Snowflake

Dmitry Anoshin, Dmitry Shirokov, Donna Strok, Jumpstart Snowflake (good book about Snowflake, is introductionary, all common features of Snowflake explained).


Powershell

Don Jones and Jeffrey Hicks, Learn Powershell scripting in a month of Lunches (great book about Powershell)

dinsdag 8 december 2020

Introduction to GIT

Introduction

Today, a quick introduction in Git. In this blogpost a couple of familiar Git commands will pass and I will demonstrate the commands in small demos.


Installation

But first download the software of Git to your local machine and install the software locally. Verify the installation by using the following command : "Git version". This will return the current version of Git. 


git version


In my case this results in the following version 2.28.0.


Demo

For this blogpost I created a folder with some files and I will experiment with these files : FileA, FileB and FileC.


And in every file I inserted the following phrase. This is and example for File A:


This is File A


Initialize the repository

When the file are there, the first statement that needs execution is Git init. This command creates an empty Git repository (basically a .git directory with subdirectories for objects, refs/heads, refs/tags, and template files. An initial HEAD file that references the HEAD of the master branch is also created.


Git init


A message appears when the initialization is ready. 


Running git init in an existing repository is safe. It will not overwrite things that are already there. The primary reason for rerunning git init is to pick up newly added templates.


Add the files to the repository

With git add you can add the files to the l(local) repository. It typically adds the current content of existing paths as a whole. This command updates the staging area (index) using the current content.


git add .


And now the files are added to the staging area. The git status command displays the state of the working directory and the staging area. It lets you see which changes have been staged, and which haven’t, and which files aren’t being tracked by Git. The Git status output does not show you any information regarding the committed project history. For this, you need to use git log.


git status


Here the result of the git status. The files are in the staging area but they need to be committed.


The "commit" command is used to save your changes to the local repository. Creating a new commit containing the current contents of the index and the given log message describing the changes. The new commit is a direct child of HEAD, and the branch is updated to point to it,

git commit -m "new files"


Here the result of the commit of the files.


Now let's check the commit with "git status".

git status


So what have we done so far? We have added the files from the working directory to the staging area (aka index) with the "git add" command and with "git commit" we added the files from the staging area to repository.


Check this out with the "git log" command.

git log


Change the file

Now let's edit the file FileA with some changes.


Save it and check the status with "git status".

git status


Git status reports that FileA is changed and these changes are not added and commit to the repository.


Let's add the file to the staging area with "git add".

git add FileA.txt
git status


"Git status" reports that the file is changed and add to the staging are, now. But they need a commit to the repository.


So, let's commit the changed to the repository with the "git commit" command.

git commit -m "FileA is changed"
git status
git log


And here is the result of the "git log". There are now two commits and HEAD is poinitng to the master. 


The next step is changing fileC and add this file to the repository.


Execute the following commands and see the results. One command I haven't explained yet is git diff. From the Git site : "Show changes between the working tree and the index or a tree, changes between the index and a tree, changes between two trees, changes resulting from a merge, changes between two blob objects, or changes between two files on disk".

git status
git diff
git add FileC.txt
git commit -m "FileC- Changed"
git log


And now there are three commits and changes


It is also possible to go back one (or more) version of the code. You can execute this with
"git checkout" command.

git checkout b81a42d23c48657dc976372d989a09e9cb6022ed


And now the original file is back.


git log


It's not possible to see the successors of the commits with "git log", now. Now let's go back to the last changes 

git checkout b81a42d23c48657dc976372d989a09e9cb6022ed


And now the last commit file is back


And with "git log" we see that we are back on the latest commit of the master branch.

git log


Used resources 

For this blogpost I've used the following resources :

Final Thoughts

This is a small introduction to git. 

Hennie

maandag 7 december 2020

Snowflake : Streams and tasks

Introduction

The next subject in the Snowflake series I would like to discuss is streams and tasks. Streams and tasks can be used to create and automate data processing in a CDC manner. When something changes in a source table, the target table is processed with this event. That's the idea. Now with Snowpipe you can automatically ingest data into Snowflake and with streams and tasks it's possible to process the data one step further into data warehouse, for instance. So that's my aim for this blogpost, to show how to do processing with streams and tasks.


For this blogpost I'm referring to a blogpost I wrote earlier about Snowpipe : Loading data with Snowpipe on Azure. But for this blogpost, I'm not using the Snowpipe for the sake of simplicity. You can imagine that when I replace the automatic insertion with Snowpipe with the manual table manipulations you get the same result.

According to the blog of  David Oyegoke, streams are powered by the timetravel feature, you can query it and when the data is consumed the offset is moved forward automatically. It's like a queue.  With Tasks you can run SQL statements or run a stored procedure in a time triggered manner and it's possible to connect the tasks in a tree like manner.


Streams demo

For this blogpost, I've created a small setup with the table FactInternetSales from AdventureWorks that I've created earlier in my blogpost Loading data with Snowpipe on Azure. Now let's start this setup with creating a target table. I name this FactInternetSales_target. In my previous blogpost about snowpipe I already created a FactInternetSales table where data is loaded into.

CREATE TABLE IF NOT EXISTS dbo.FactInternetSales_target(
	ProductKey int NOT NULL,
	OrderDateKey int NOT NULL,
	DueDateKey int NOT NULL,
	ShipDateKey int NOT NULL,
	CustomerKey int NOT NULL,
	PromotionKey int NOT NULL,
	CurrencyKey int NOT NULL,
	SalesTerritoryKey int NOT NULL,
	SalesOrderNumber nvarchar(20) NOT NULL,
	SalesOrderLineNumber tinyint NOT NULL,
	RevisionNumber tinyint NOT NULL,
	OrderQuantity smallint NOT NULL,
	UnitPrice float NOT NULL,
	ExtendedAmount float NOT NULL,
	UnitPriceDiscountPct float NOT NULL,
	DiscountAmount float NOT NULL,
	ProductStandardCost float NOT NULL,
	TotalProductCost float NOT NULL,
	SalesAmount float NOT NULL,
	TaxAmt float NOT NULL,
	Freight float NOT NULL,
	OrderDate datetime NULL,
	DueDate datetime NULL,
	ShipDate datetime NULL
);

Now let's create a stream with SQL.

DROP STREAM IF EXISTS FactInternetSales_target_stream;

CREATE OR REPLACE STREAM FactInternetSales_target_stream 
    ON TABLE dbo.FactInternetSales;

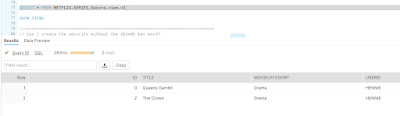
You can not use the same name as the table resulting in an error when you try: SQL compilation error: Object found is of type 'TABLE', not specified type 'STREAM'.

Now, the next step is to query the stream. You can query the stream like a table

SELECT * FROM FactInternetSales_target_stream 

There is nothing in there right now. So the data in the table FactInternetSales is not initially inserted when the stream is created.


From my previous experiments with Snowpipe there are about 250 K records in there. First let's clear the table and see what happens in the stream. 

DELETE FROM FactInternetSales

SELECT * FROM FactInternetSales_target_stream 

Resulting in a stream that is filled with records that are indicated as deleted.


Merge the records

I borrowed a Merge statement from Lee Harrington for some of my experiments with streams and tasks. 

MERGE INTO dbo.FactInternetSales_target AS TRG
USING (SELECT * 
       FROM FactInternetSales_target_stream 
       WHERE NOT (metadata$action = 'DELETE' 
        and metadata$isupdate = TRUE)) AS STR
ON TRG.SalesOrderNumber = STR.SalesOrderNumber 
    AND TRG.SalesOrderlineNumber = STR.SalesOrderLineNumber
WHEN MATCHED AND STR.metadata$action = 'INSERT'
             AND STR.metadata$isupdate = TRUE THEN 
     UPDATE SET
        TRG.ProductKey				= STR.ProductKey,
        TRG.OrderDateKey			= STR.OrderDateKey,
        TRG.DueDateKey				= STR.DueDateKey,
        TRG.ShipDateKey				= STR.ShipDateKey,
        TRG.CustomerKey				= STR.CustomerKey,
        TRG.PromotionKey			= STR.PromotionKey,
        TRG.CurrencyKey				= STR.CurrencyKey,
        TRG.SalesTerritoryKey		= STR.SalesTerritoryKey,
        TRG.SalesOrderNumber		= STR.SalesOrderNumber,
        TRG.SalesOrderLineNumber	= STR.SalesOrderLineNumber,
        TRG.RevisionNumber			= STR.RevisionNumber,
        TRG.OrderQuantity			= STR.OrderQuantity,
        TRG.UnitPrice				= STR.UnitPrice,
        TRG.ExtendedAmount			= STR.ExtendedAmount,
        TRG.UnitPriceDiscountPct	= STR.UnitPriceDiscountPct,
        TRG.DiscountAmount			= STR.DiscountAmount,
        TRG.ProductStandardCost		= STR.ProductStandardCost,
        TRG.TotalProductCost		= STR.TotalProductCost,
        TRG.SalesAmount 			= STR.SalesAmount,
        TRG.TaxAmt 					= STR.TaxAmt,
        TRG.Freight					= STR.Freight,
        TRG.OrderDate				= STR.OrderDate,
        TRG.DueDate					= STR.DueDate,
        TRG.ShipDate				= STR.ShipDate
WHEN MATCHED AND STR.metadata$action = 'DELETE' THEN DELETE
WHEN NOT MATCHED AND STR.metadata$action = 'INSERT' THEN 
    INSERT (
       ProductKey,
      OrderDateKey,
      DueDateKey,
      ShipDateKey,
      CustomerKey,
      PromotionKey,
      CurrencyKey,
      SalesTerritoryKey,
      SalesOrderNumber,
      SalesOrderLineNumber,
      RevisionNumber,
      OrderQuantity,
      UnitPrice,
      ExtendedAmount,
      UnitPriceDiscountPct,
      DiscountAmount,
      ProductStandardCost,
      TotalProductCost,
      SalesAmount ,
      TaxAmt ,
      Freight,
      OrderDate,
      DueDate,
      ShipDate
    ) 
    VALUES(
        STR.ProductKey,
        STR.OrderDateKey,
        STR.DueDateKey,
        STR.ShipDateKey,
        STR.CustomerKey,
        STR.PromotionKey,
        STR.CurrencyKey,
        STR.SalesTerritoryKey,
        STR.SalesOrderNumber,
        STR.SalesOrderLineNumber,
        STR.RevisionNumber,
        STR.OrderQuantity,
        STR.UnitPrice,
        STR.ExtendedAmount,
        STR.UnitPriceDiscountPct,
        STR.DiscountAmount,
        STR.ProductStandardCost,
        STR.TotalProductCost,
        STR.SalesAmount ,
        STR.TaxAmt ,
        STR.Freight,
        STR.OrderDate,
        STR.DueDate,
        STR.ShipDate
    );

Executing this query results in zeros because there was nothing in the target table.


Insert a record

I wish I used a smaller table for this blogpost;-). Now, what happens if an Insert statement is executed on the source table FactInternetSales?

INSERT INTO dbo.FactInternetSales (
       ProductKey,
      OrderDateKey,
      DueDateKey,
      ShipDateKey,
      CustomerKey,
      PromotionKey,
      CurrencyKey,
      SalesTerritoryKey,
      SalesOrderNumber,
      SalesOrderLineNumber,
      RevisionNumber,
      OrderQuantity,
      UnitPrice,
      ExtendedAmount,
      UnitPriceDiscountPct,
      DiscountAmount,
      ProductStandardCost,
      TotalProductCost,
      SalesAmount ,
      TaxAmt ,
      Freight,
      OrderDate,
      DueDate,
      ShipDate
    ) 
VALUES
    (
      777,
      20101229,
      20110110,
      20110105,
      21768,
      1,
      19,
      6,
      'SO43697', 
      1,
      1,
      1,
      357827,
      357827,
      0,
      0,
      21712942,
      21712942,
      357827,
      2862616,
      894568,
      to_timestamp('29/12/2010 00:00', 'DD/MM/YYYY HH:MI'),
      to_timestamp('10/01/2011 00:00', 'DD/MM/YYYY HH:MI'),
      to_timestamp('05/01/2011 00:00', 'DD/MM/YYYY HH:MI')
    );
Let's investigate the stream and see what content is of the stream. The stream shows a record with the METADATA$ACTION = 'INSERT'


Let's execute the MERGE statement to test whether we can insert the record in the table.The stream is empty now:


But the FactInternetsales_target table is filled with data


Update a record

A next step is to check out an update of a record in the source table. If a record is updated in the source table, how does the stream look like? Here an example of the UPDATE statement.

UPDATE FactInternetSales
SET Unitprice = 213123
Results in : 

And run the MERGE statement again and here is the result of that:


Delete a record

After the insertion, the update, let's take a look at the deletion of a record. What happens in the stream?

DELETE FROM FactInternetSales

Here is a screendump from the stream. The Metacolumn indicates a DELETE.


Now execute the MERGE statement


And now the target table is empty. The record is deleted.


Delete the source table

While experimenting I deleted the source table. When I triedd to query the stream an error occurred.


Just a recreate of the stream is enough to get it working again.


Tasks explained

We have experimented a bit with streams, let's take a look at tasks. Task objects defines a recurring schedule for executing a SQL statement or stored procedures. Tasks can be chained together for successive execution. In this way it's possible to load a data warehouse for instance: first staging, datavault and perhaps data marts.  Lets, see how we can utilise the tasks feature of snowflake to automate the work we have done.

First create the task with the CREATE TASK statement. I integrated the MERGE statement I developed earlier and described in this blogpost (see above).

--- CREATE TASK
CREATE TASK TASK_FactInternetSalesEveryMinute
  WAREHOUSE = COMPUTE_WH
  SCHEDULE = '1 MINUTE' 
AS
MERGE INTO dbo.FactInternetSales_target AS TRG
USING (SELECT * 
       FROM FactInternetSales_target_stream 
       WHERE NOT (metadata$action = 'DELETE' AND metadata$isupdate = TRUE)
) AS STR
ON TRG.SalesOrderNumber = STR.SalesOrderNumber 
    AND TRG.SalesOrderlineNumber = STR.SalesOrderLineNumber
WHEN MATCHED AND STR.metadata$action = 'INSERT'
             AND STR.metadata$isupdate = TRUE THEN 
     UPDATE SET
        TRG.ProductKey				= STR.ProductKey,
        TRG.OrderDateKey			= STR.OrderDateKey,
        TRG.DueDateKey				= STR.DueDateKey,
        TRG.ShipDateKey				= STR.ShipDateKey,
        TRG.CustomerKey				= STR.CustomerKey,
        TRG.PromotionKey			= STR.PromotionKey,
        TRG.CurrencyKey				= STR.CurrencyKey,
        TRG.SalesTerritoryKey		= STR.SalesTerritoryKey,
        TRG.SalesOrderNumber		= STR.SalesOrderNumber,
        TRG.SalesOrderLineNumber	= STR.SalesOrderLineNumber,
        TRG.RevisionNumber			= STR.RevisionNumber,
        TRG.OrderQuantity			= STR.OrderQuantity,
        TRG.UnitPrice				= STR.UnitPrice,
        TRG.ExtendedAmount			= STR.ExtendedAmount,
        TRG.UnitPriceDiscountPct	= STR.UnitPriceDiscountPct,
        TRG.DiscountAmount			= STR.DiscountAmount,
        TRG.ProductStandardCost		= STR.ProductStandardCost,
        TRG.TotalProductCost		= STR.TotalProductCost,
        TRG.SalesAmount 			= STR.SalesAmount,
        TRG.TaxAmt 					= STR.TaxAmt,
        TRG.Freight					= STR.Freight,
        TRG.OrderDate				= STR.OrderDate,
        TRG.DueDate					= STR.DueDate,
        TRG.ShipDate				= STR.ShipDate
WHEN MATCHED AND STR.metadata$action = 'DELETE' THEN DELETE
WHEN NOT MATCHED AND STR.metadata$action = 'INSERT' THEN 
    INSERT (
       ProductKey,
      OrderDateKey,
      DueDateKey,
      ShipDateKey,
      CustomerKey,
      PromotionKey,
      CurrencyKey,
      SalesTerritoryKey,
      SalesOrderNumber,
      SalesOrderLineNumber,
      RevisionNumber,
      OrderQuantity,
      UnitPrice,
      ExtendedAmount,
      UnitPriceDiscountPct,
      DiscountAmount,
      ProductStandardCost,
      TotalProductCost,
      SalesAmount ,
      TaxAmt ,
      Freight,
      OrderDate,
      DueDate,
      ShipDate
    ) 
    VALUES(
        STR.ProductKey,
        STR.OrderDateKey,
        STR.DueDateKey,
        STR.ShipDateKey,
        STR.CustomerKey,
        STR.PromotionKey,
        STR.CurrencyKey,
        STR.SalesTerritoryKey,
        STR.SalesOrderNumber,
        STR.SalesOrderLineNumber,
        STR.RevisionNumber,
        STR.OrderQuantity,
        STR.UnitPrice,
        STR.ExtendedAmount,
        STR.UnitPriceDiscountPct,
        STR.DiscountAmount,
        STR.ProductStandardCost,
        STR.TotalProductCost,
        STR.SalesAmount ,
        STR.TaxAmt ,
        STR.Freight,
        STR.OrderDate,
        STR.DueDate,
        STR.ShipDate
    );

Okay, that is done. The Task is created but why isn't it running yet. Executing Show tasks can help you understand the status of the Task. 

SHOW TASKS;

Now, it's clear that the task is suspended.


We have to execute a RESUME on the task in order to get the Tasks running.

ALTER TASK TASK_FactInternetSalesEveryMinute RESUME

Now let's run the experiments as before : Insert a record, update a record and delete a record

Insert

Update:


Delete:
Nothing is there..

Now the Merge statement isn't manually executed anymore but in an automated manner. Really cool! With a few statements automatically loading data into a data warehouse.

Final Thoughts

Now, I haven't implemented this as a SCD2, but you can imagine that is very easy to built this with a MERGE statement. Perhaps you can build a stored procedure for automating the load with TASKS. 

Hennie

vrijdag 4 december 2020

Integration Azure Devops with Azure Active Directory

If you want to integrate Azure DevOps with Azure Active Directory, there is an option in Azure Devops where you are able to select an Azure Subscription. The option is available by selecting Organizational settings (left under in the opening window) :


Choose Azure Active Directory and the next step is selecting the option "Connect directory"


Select the Azure Active Directory (I had several ones) :


And the confirmation is there when everything is ok.


And the conformation is also presented in the AAD windows, where there is the option to Disconnect if you want.


And now you can add users from your AAD into your Azure DevOps account


When pressed on Add you see the next window :


And you can the users to a team :


A small blogpost about how to connect Azure Devops with Azure Active Directory.


Hennie

donderdag 3 december 2020

Snowflake : Time travelling

Introduction

In this blogpost I'll dive into the timetravel feature of Snowflake. Timetravel is the way that handles data protection (CDP) of the database. This is another concept than backups, that we were used to do with Oracle or SQL Server. With time travel you can time travel until 90 days with Enterprise Edition. With the ability of timetravel you can perform actions like querying previous version of the state of a table, restore tables, schemas or even databases at specific points in the past. Or you can even restore tables or databases that have been dropped. For these reasons you had to restore a backup from the backup device and perhaps you were dependent on administrators for that and that could be very timeconsuming. Now with a simple statement a simple restore is done.

I've gathered some experiments with Timetravel, below.

Experiments


1. Drop and undrop database
The first experiment is dropping the database and undropping the database. With the UNDROP command the database is restored.

CREATE DATABASE IF NOT EXISTS TIMETRAVELDB;

DROP DATABASE IF EXISTS TIMETRAVELDB;

UNDROP DATABASE TIMETRAVELDB;

2 . Retrieve an earlier version of a table (as a clone)
The next experiment is restoring a previous version of a table. We start with the creation of a table, insert some data and then delete a value. With time travel we retreive the previous version of the table.

USE TIMETRAVELDB;

CREATE TABLE IF NOT EXISTS customer (id int, name varchar);

INSERT INTO customer VALUES (1, 'Hennie'), (2, 'Peter'), (3, 'Karen') ;

SELECT * FROM customer

Resulting in: 


Now, we delete a record with the DELETE statement
DELETE FROM customer WHERE ID = 2;

SELECT * FROM customer

Resulting in :


Now, we restore the table at a particular moment with the CLONE of the table.
CREATE TABLE customer3 CLONE customer
At (timestamp => 'Wed, 02 dec 2020 11:33:00'::TIMESTAMP_NTZ(9));

SELECT * FROM customer3

Resulting in :


3,. Using an Offset to retrieve data
Another option is using an offset. With offset you go back in time from now minus some value in seconds. In the example 1200 seconds is used.
SELECT * FROM customer AT (OFFSET => -1200)

Resulting in :


4. Using an Queryid to retrieve data
It is also query a table at a certain query moment in time. Every query has a query id and you can time travel with this query id.

SELECT * FROM customer AT (statement => '0198a874-00b0-10e1-0000-72e900010322')

Resulting in :


4. Investigating the parameters

Here are some examples that queries the parameters for the time travel parameters.
SHOW Parameters;

SHOW Parameters in database ADVENTUREWORKS;

SHOW Parameters in WAREHOUSE COMPUTE_WH;

SHOW Parameters in account;

SHOW Parameters LIKE 'DATA%' IN ACCOUNT

SHOW Parameters LIKE 'DATA%'  in database ADVENTUREWORKS;

5. Setting the time travel parameter
Next, here are some examples on setting the time travel properties : DATA_RETENTION_TIME_IN_DAYS

ALTER DATABASE ADVENTUREWORKS SET DATA_RETENTION_TIME_IN_DAYS = 2;

ALTER ACCOUNT SET DATA_RETENTION_TIME_IN_DAYS = 2;

Final thoughts

This blogpost is about timetravelling. I've gathered some examples that may come in handy for using in Snowflake projects.

Hennie