Introduction
Timetravel has become a common functionality in Cloud dataplatforms like Snowflake, Databricks and Microsoft Fabric. It is quite easy to use and it can save you when you have done something that not is smart to do;-). For instance, when you delete data in a table accidently, you didn't want to delete.
Snowflake has 3 options :
- TIMESTAMP
- OFFSET
- STATEMENT
With all of these options you can use AT and BEFORE.
What are objects that can be used for timetravel ? :
- TABLE.
- SCHEMA.
- DATABASE.
So I've conducted a couple experiments with Timetravel, in which I explore the different options.
Setup the experiment
//============================================================================
// Set context
//============================================================================

ALTER WAREHOUSE IF EXISTS COMPUTE_WH RESUME IF SUSPENDED;

USE ROLE SYSADMIN;
USE WAREHOUSE Compute_WH;

//============================================================================
// Setup database
//============================================================================
CREATE OR REPLACE DATABASE TIMETRAVEL_TIMESTAMP;

USE TIMETRAVEL_TIMESTAMP;

//============================================================================
// setup tables
//============================================================================
CREATE OR REPLACE TABLE CUSTOMER (ID INT, NAME VARCHAR);

INSERT INTO CUSTOMER VALUES (1, 'Hennie'), (2, 'Peter'), (3, 'Karen') ;

SELECT * FROM CUSTOMER ;

--Record the time and use this Later
SELECT CURRENT_TIMESTAMP();
--2023-12-14 04:00:36.407 -0800

--Record the UTC time and use this Later
SELECT CONVERT_TIMEZONE( 'America/Los_Angeles' , 'UTC' , CURRENT_TIMESTAMP())
--2023-12-14 12:00:25.925


-- Wait for 5 a 10  seconds
INSERT INTO CUSTOMER VALUES (4, 'Frank');

SELECT * FROM CUSTOMER ;
Results in :

Timestamp with AT
The first item I want to explain is the AT. The AT keyword specifies that the request is inclusive of any changes made by a statement or transaction with timestamp equal to the specified parameter.
Time travel based on the UTC time
If you don't specify anything, timetravel is based on UTC time.
SELECT *
FROM CUSTOMER AT (TIMESTAMP => '2023-12-14 12:00:25.925'::timestamp);           --UTC Time

SELECT *
FROM CUSTOMER AT (TIMESTAMP => '2023-12-14 04:00:36.407 -0800'::timestamp_ltz); --LA time

-- LA time without timezone information
SELECT *
FROM CUSTOMER AT (TIMESTAMP => '2023-12-14 12:00:25.925'::timestamp_ltz);

Timestamp with BEFORE
Here is an example between the two INSERT statements :
--AT  UTC Time
SELECT *
FROM CUSTOMER BEFORE (TIMESTAMP => '2023-12-14 12:00:25.925'::timestamp);
And this results in :

--AT  UTC Time (5 minutes later)
SELECT *
FROM CUSTOMER BEFORE (TIMESTAMP => '2023-12-14 12:05:25.925'::timestamp);

OFFSET (with AT)
SELECT * FROM CUSTOMER AT (OFFSET => -60*37) AS T 
STATEMENT (with BEFORE)
//============================================================================
// TIMETRAVEL with STATEMENT
//============================================================================
-- Before the CREATE STATEMENT
select * from CUSTOMER before(statement => '01b0fb67-0103-36c3-0000-72e9003dc0c6');
--Statement 01b0fb67-0103-36c3-0000-72e9003dc0c6 cannot be used to specify time for time travel query.

-- Statement Query id at the CREATE statement
select * from CUSTOMER before(statement => '01b0fb70-0103-36c3-0000-72e9003dc0de');
--Statement 01b0fb70-0103-36c3-0000-72e9003dc0de cannot be used to specify time for time travel query.

-- Statement Query id after the CREATE Statement and at the insert statement
select * from CUSTOMER before(statement => '01b0fb70-0103-36c2-0000-72e9003dd10a');
--Query produced no results

-- Statement Query id after the INSERT Statement
select * from CUSTOMER before(statement => '01b0fb70-0103-36c3-0000-72e9003dc0ea');
--Query Produces rows

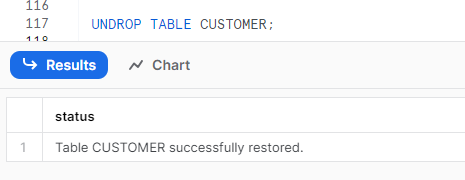
Undrop a object
DROP TABLE CUSTOMER;

UNDROP TABLE CUSTOMER;
Experiment 2 with undrop
CREATE OR REPLACE TABLE CUSTOMER (ID INT, NAME VARCHAR);

INSERT INTO CUSTOMER VALUES (1, 'Hennie'), (2, 'Peter'), (3, 'Karen') ;

DROP TABLE CUSTOMER;

CREATE OR REPLACE TABLE CUSTOMER (ID INT, NAME VARCHAR, BLA INT);

INSERT INTO CUSTOMER VALUES (1, 'Hennie', 100), (2, 'Peter', 200), (3, 'Karen', 300) ;

SELECT * FROM CUSTOMER

-- Show the history of the table
SHOW TABLES HISTORY;

-- Now rename the table
ALTER TABLE CUSTOMER RENAME TO CUSTOMER_Current;

-- Undrop the table
UNDROP TABLE CUSTOMER;

SELECT * FROM CUSTOMER;

Create a clone with timetravel
CREATE OR REPLACE TABLE CUSTOMER_CLONE
CLONE CUSTOMER AT (TIMESTAMP => '2023-12-14 12:00:25.925'::timestamp);

SELECT * FROM CUSTOMER_CLONE;

Geen opmerkingen:
Een reactie posten